Facebook App can be activated or deactivated on the App Center of your system, on [App Center > Communication > Facebook App].
To integrate user registration on your website with Facebook, you must enter the Facebook application ID on the Stays App Center. To do this, you must follow the steps below and generate your application on your company's Facebook account.
Step 1. Access the Facebook Developer Dashboard
- Log in to https://developers.facebook.com and click on [Login] in the upper right corner.

- After logging in, access [My apps].

Step 2. Create you app
By accessing the dashboard, click on [Apps] and then click on [Create App].
 Step 3. Fill out the information
Fill out the details and click on [Next].

Step 4. Choose one of the options
- On the left side, filter the options by clicking on [All].
- Select the [Create an app without a use case] option and then move on to the next steps until you complete the process: App details > Use cases > Business > Requirements > Overview.

Step 5. Set up your app
After you finish the previous step, the page will show the initial dashboard.
- Click on [App settings > Basic].

- Copy the [App ID] and the [App secret].

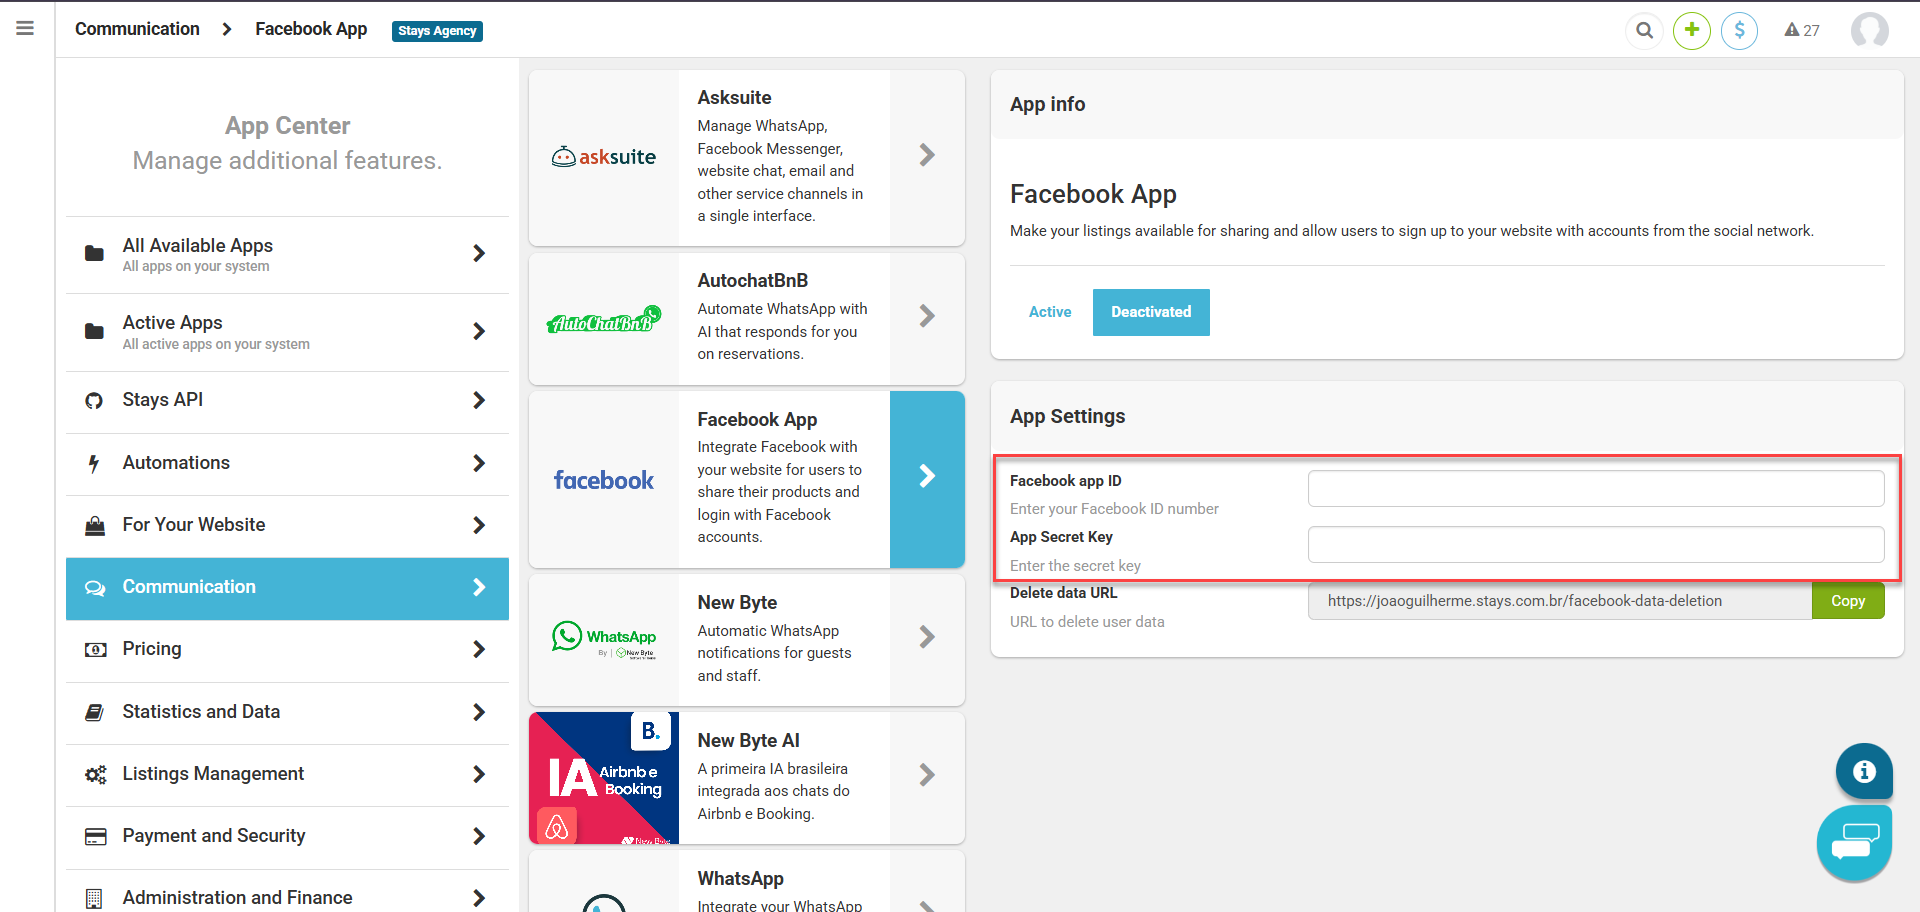
Step 6. Settings in Stays
- Access Stays, go to [App Center > Communication > Facebook App];
- Click on [App Settings];
- Paste the ID and app secret from the previous step into their corresponding fields: [Facebook app ID] and [App Secret Key].